Welcome

Welcome, nau mai, haere mai!
Come on in and stay a little while. . . you never know what you might find!
Showing posts with label fruit. Show all posts

Monday, August 15, 2011

Eat. . . When life gives you lemons. . .

When life gives you lemons. . .

. . . make lemon curd! And little lemon cakes/muffins!

I was half way through making lemon curd yesterday morning when that well-known saying sprang to mind - "When life gives you lemons. . . make lemonade!" Saturday was indeed a lemon of a day. To quote Sonny Jim: "It sucked!" But it was purely coincidental that I started making lemon curd on Sunday morning - just a need to do something useful, over which I had control (albeit tenuous at the point where you add cold beaten eggs to hot melted butter, lemon and sugar!) So an enjoyable morning of lemoniness was to be my diversion yesterday. . . first I made the lemon curd and then when faced with all the lemon rind residue in the bottom of the sieve, I knew it was far too tasty to throw out, so made little lemon cakes instead!

Here's how. . .

Lemon Curd/Honey/Butter/Cheese

4 lemons
12 oz caster sugar
6 oz butter, chopped
4 large eggs

First, attempt to sterilise your jam jars by heating at 150C in the oven for 15 mins or filling with boiling water.

Put the lemon juice, zest, sugar and butter in a ceramic or glass bowl over a pan of simmering water (or a double boiler if you happen to have such a thing!) Don't let the water touch the bottom of the bowl.

Thickening the lemon curd

Stir it until the sugar dissolves and butter melts. Add a bit more juice if you think it tastes too sweet.

Beat the eggs in another bowl until well combined. Now for the scary bit - add a little bit of the hot mixture to the eggs, stir well then add the whole lot to the hot lemon, sugar and butter mixture. At this point you need to hope desperately that it won't curdle. If it does, try plunging the bowl into cold water and stirring like crazy.

Assuming all goes well, and it doesn't curdle (I've made it three times in the last year and it's never curdled yet!) stir it constantly until the mixture thickens. It will thicken more in the jar so don't expect it get to the final texture. This will take between 5 and 20 minutes depending on how fast you are heating the mixture (ie how daring you are being!) but DON'T LET IT BOIL!!

Stirring the lemon loveliness

Once your bowl of lemon loveliness has reached the desired thickness, pour it through a sieve into a jug.

Sieving the lemon curd

Next, pour the sieved lemon curd from the jug into your sterilised jars and screw on the lids. I did a double mixture and this is how much it yielded. . .

Lemon curd

Store in the fridge and eat within 2-3 weeks. Delicious on bread, toast, scones, as a sponge cake filling, inside lemon muffins, on ice cream etc etc. Good luck making it last 3 weeks!

You will be left with a lot of lemon rind and maybe a few small eggy bits in your sieve. . .

Lemon curd residue

Of course, you could just put this on your compost heap, but I couldn't bear to part with all that lemony loveliness, so decided to dig out an old lemon cake recipe from one of my handwritten recipe books of years gone by. I put the mixture in muffin tins instead of a cake tin though and omitted the lemon syrup glaze, as that suits us better for packed lunch treats straight from the freezer.

Lemon Cake

175 g/6 oz margarine
175 g/6 oz caster sugar
2 eggs
4 tblsps milk
175 g/6 oz SR flour
Finely grated zest and juice of 1 large lemon (or ALL your lemon curd residue from the sieve!)
1 tblsp icing sugar

Heat the oven to 180C/350F/gas mark 4. Lightly grease and line  a 2lb loaf tin.
Cream marg and sugar till light and fluffy then gradually beat in lightly whisked eggs and milk. Lightly fold in sieved flour and lemon zest (or lemon curd residue).
Place in prepared tin and bake for 30 mins, then slightly reduce oven temp and bake for further 30 mins or until cake is golden brown, firm to touch and beginning to shrink from sides of tin. Mix lemon juice and icing sugar and pour over cake straight away. If using muffin tin cook for 15 - 20 mins only.

Lemon muffins using lemon curd residue

Lemon muffin

Yum!

Sunday, July 10, 2011

Eat. . . Persimmons

Sonny Jim eyes up the persimmon harvest in June this year
 To me, persimmons were an unknown exotic fruit before coming to New Zealand. Sure, I had seen a few "Sharon fruit" in the UK supermarket at unrealistically high prices, but they were out of my price range and experience. So I just looked at them, thought they looked interesting and walked on by. Our first autumn in Aotearoa/NZ back in 2002 was a revelation though! Some new friends of ours near Blenheim had a tree, and willingly shared their bountiful harvest with us, and I was hooked! As was Sonny Jim, who wasn't even two years old back then!
Our bountiful bucket of persimmon
Since starting work with my current employers three years ago I have frequently been the recipient of gourmet goodness from one of my colleagues, who has a plentiful supply of fruit from her orchard. May and June mean persimmons, and we have received an abundance. Then a chance meeting with another acquaintance revealed that she had a persimmon tree straining under the weight of its fruit and would love to give some away, so Sonny Jim and I went out there to pick some. See photo of tree above. . .

It turned out that this woman's husband is an entomologist and he took great delight in showing us the beautiful steely blue ladybirds which live around the leafy bits of the persimmon stalks. They are good insects to have around as they eat up aphids and help control black scale, as well as looking beautiful in their own tiny way. . .
Steelblue ladybird - Halmus Chalybeus. Photo from wikipedia
Anyway, for several glorious weeks, we were all eating at least one persimmon a day, often many more. Sadly the season is now over, so we will have to wait for another ten months before we can next indulge in one of our favourite fruits. Mind you, that is actually one of my favourite things about NZ - that foods are available a lot more seasonally here, in contrast to what I am used to in the UK. The fact that things like figs, persimmon, asparagus and berries are only available for a few weeks of the year  each, makes you savour them that much more when they are around. Plus of course, eating seasonally is more "natural" and therefore cheaper - always a bonus!

Cross-section of persimmon fruit - left: crunchy, right: soft.

Monday, May 30, 2011

Knit. . . Watermelon dress, leafy shrug (and a woolly gift from afar).

I started making this watermelon sundress last June, as a gift for a dear friend's 5 year old daughter. I was on holiday in the UK at the time and I took the fabric and yarn with me all the way from NZ specially, aiming to use my mum's sewing machine while staying with her! All went well and I knitted up the bodice and sewed the skirt while I was there in Somerset, and then ground to a halt. Silly really - it has been languishing in a cupboard for almost a year, just waiting for the skirt to be gathered, bodice and ribbon sewn on and finally the three buttons added. Well, I am glad to report that just last week I finally finished this very slow-cooked project! The pattern is called The Two Summer Sundress, by Natalie Larson. The idea is that the first summer the straps are worn crossed over at the back, and the second summer, in order to add a bit of extra length the straps go to the same-sided button at the back. Ingenious!

Close up of dress back.
 Once the dress was finished, I decided that the 5 year old recipient needed a little something to cover her shoulders on a breezy day, and I set to work on a leafy shrug. Now that I have finished both the dress and shrug and washed and blocked them I will be popping them in the post to Oregon, USA this week. Very much looking forward to seeing some photos of a certain beautiful little five year old modelling them. . .

P.S.

The photo above was going to be the end of this post, but then when I got home from work today there was a surprise package waiting for me, all the way from Cambridge! A lovely ravelry friend had offered to send me some sock yarn scraps, and I knew they were on the way, but I had absolutely no idea the package would contain a stunningly beautiful pair of socks, knitted for me by this modern day "pen-friend" whom I have never met, yet have shared a lovely written friendship with! 
 The sock design is Julia Socks by Emily Johnson, and they are based on a character from The Night Watch by Sarah Waters, which is a most excellent book. It was shortlisted for the Man Booker Prize and the Orange Prize, so it's not just me who thinks so either! The following is the blurb about "The Night Watch" from Sarah Waters' website, linked above: Moving back through the 1940s, through air raids, blacked out streets, illicit liaisons, sexual adventure, to end with its beginning in 1941, The Night Watch is the work of a truly brilliant and compelling storyteller.
This is the story of four Londoners – three women and a young man with a past, drawn with absolute truth and intimacy. Kay, who drove an ambulance during the war and lived life at full throttle, now dresses in mannish clothes and wanders the streets with a restless hunger, searching. Helen, clever, sweet, much-loved, harbours a painful secret. Viv, glamour girl, is stubbornly, even foolishly loyal, to her soldier lover. Duncan, an apparent innocent, has had his own demons to fight during the war. Their lives, and their secrets connect in sometimes startling ways. War leads to strange alliances…
Tender, tragic and beautifully poignant, set against the backdrop of feats of heroism both epic and ordinary, here is a novel of relationships that offers up subtle surprises and twists. The Night Watch is thrilling. A towering achievement. 

According to the Julia sock pattern details "they are named for the glamorously androgynous Julia Standing, a character in Sarah Waters' 2006 novel The Night Watch". Strangely enough, as you can see in the photo above, I own a copy of the Night Watch book (and also the audiobook) and it is a firm favourite of mine, yet as far as I know, "S" all the way over in Cambridge didn't know that. I had certainly never mentioned it. What an amazingly intuitive choice! The pattern is stunningly beautiful and the yarn is in my all time favourite colour - teal. I love the name of the yarn too: Laughing Yaffle sock yarn in the "Teal-tastic"colourway. I feel like a very lucky person, I can tell you.
My beautiful socks with sock yarn scraps. . .

I love how the pattern continues onto the heel flap. . .
I just checked S's project page on ravelry and see that she has updated the details now that I have received the socks. She had named the project "Dragonfly socks" and S says that apparently in Japanese culture dragonflies are symbols of strength, courage and happiness. What a lovely association!!

P.P.S.

I have counted the paper cranes in the competition and all will be revealed tomorrow ;-)

Saturday, April 9, 2011

Eat. . . a glut of apples and baking

Local apple tree, March 2011
Autumn is really setting in here, and it seems everywhere you look there are the new season's crisp, fresh apples available for a bargain price. It helps that we live in one of New Zealand's major apple producing areas. Just a few minutes walk away from home is an old "Cool Store" from the Apple and Pear Marketing Board of yesteryear. In addition to all the cheap apples available at roadside stalls, one of my kind and generous work colleagues has provided us with several bags of various breeds of cooking and eating apples from her trees, and one day we came home from dog walk to find a bag of beautiful green apples behind the front door (still haven't worked out who that kind benefactor was). . . so you can see that we have had a rather welcome glut of apples recently.

Of course, our first line of attack was to stew up huge saucepans of delicious stewed apple. Great for adding to porridge with cinnamon or berries, mixing with natural yogurt, or adding to breakfast muesli. We usually freeze some of it it in small portions for use later in the year. Stewed apple/apple sauce is also a delicious addition to these Choc-apple Brownies.
Choc-apple brownies


Here's the link to the recipe, which I found in the New Zealand Healthy Food Guide magazine, to which we subscribe. Thankfully the H.F.G. also have most of their recipes online. . . you might find some other interesting ones while you are over there. The only change I make to the recipe is that I don't include the walnuts as they aren't popular with all the members of our family. We also use dairy free choc chips, as a hangover from when two of us were strictly dairy-free. The use of stewed apple sauce replaces the fat content, and gives a delicious moistness to the Brownie.


Next up are Sugar-topped Apple Muffins, which are based on a recipe I got from About.com.
Sugar-topped Apple Muffins

2 cups plain flour
2 tsps baking powder
1/2 cup sugar
1/2 tsp ground nutmeg
1 tsp ground cinnamon
1/2 tsp salt
---
1 cup milk
1 egg
1/4 cup vegetable oil or melted butter/marg
---
1 cup tart grated/finely chopped apple
---
Small amount of melted butter & sugar for topping

Preheat oven to 200C/400F. Grease a 12 cup muffin tin or use paper cake cases. Combine first set of ingredients in a bowl. Whisk second set of ingredients in another bowl or measuring jug. Add apple and wet ingredients to dry ingredients. Mix until only just moistened. DO NOT OVER-BEAT (this will toughen the mixture.) Spoon into prepared muffin tin. Bake for about 20 mins, or until baked through. As soon as they are out of the oven, brush the tops with melted butter and dip them in a bowl of sugar, to give a lovely crunchy sugary top.


German Apple Cake
A real family favourite is German Apple Cake, which started life as a free recipe from allrecipes.com, but then I adapted it a bit to double the quantities but proportionately reduce the oil and sugar, increase the spices and grate rather than chop the apple. Here's my version:

4 eggs
400 ml oil
600 g sugar
4 tsps cinnamon
2 tsps salt
2 tsps vanilla essence
500 g self-raising flour (or a mix of wholemeal and SR, with 1 tsp baking powder per 100g wholemeal flour used)
1 kg apples - 900g grated and 100 g finely chopped

Preheat oven to 175C/350F. Grease and flour or line a large rectangular roasting tin or cake tin. Beat oil and eggs with electric mixer till creamy. Add sugar and vanilla and beat well. Slowly add flour, salt and cinnamon to the wet mixtureFold in the apples by hand. The mixture will be very thick. Spread mixture into prepared tin. Bake for around 45 mins or until cake tests done. Cool in tin, then cut into slices and sprinkle with icing sugar.

Last but not least, it's Sonny Jim's all-time favourite muffin recipe. . . ABC Muffins (A for Apple, B for Banana and C for Chocolate.) He has loved these muffins since he was a pre-schooler. This recipe is from the book "School Lunches and After School Snacks" by Alison and Simon Holst. As usual I couldn't resist altering it a bit - this time swapping half of the white flour for wholemeal. More tasty and substantial! I usually make a double mixture, but give you single quantities below:
ABC Muffins

3 mashed ripe bananas (from supply in freezer if you have them!)
1/2 cup brown sugar
1/4 tsp salt
1/4 cup canola oil
1 large egg
1/2 cup milk
1/2 cup chocolate chips
1 apple, grated with skin on
1 cup self-raising flour
1 cup wholemeal flour
1 tsp baking powder

Heat oven to 200C/400F. In a large bowl, mix together mashed bananas, sugar, salt, oil, egg and milk. Stir in choc chips and grated apple. Shake flour through a sieve onto everything else and fold together until just dampened. Don't over-mix once flour has gone in or your muffins will be tough little bullets! Spoon into prepared muffin tin. Bake for 10 - 15 mins until golden brown.

So, that's how we deal with a welcome glut of apples. . . how about you? Any tried and tested recipes or other ideas? Please put them in the comments ;-)

Thursday, March 31, 2011

Eat. . . Fresh figs

What could be more simple, or more delicious? Eating a fresh fig is a luscious assault on the senses - the amazingly sweet taste, the smooth and fragrant skin, the soft flesh under the skin and the myriad of tiny crunchy seeds nestled within. It's a visual and sensual delight! Can you tell I'm a fig fanatic?!
Wifie and I were given a fig tree each for our birthdays this year, but they are just little baby trees barely a foot tall, and will take a while until they give us an edible harvest. The fig season is in full swing here in the Nelson-Tasman area of New Zealand though. We have been using the local District Health Board's Healthy As website to help us locate some "help-yourself" fig trees in "Open Orchards" in the local area. Super-delicious and healthy food for free - can't be bad! The season is so relatively short, we are definitely making the most of the figs while they are here.
Yum!

Sunday, March 27, 2011

Eat. . . "Bargainaceous" box of plums


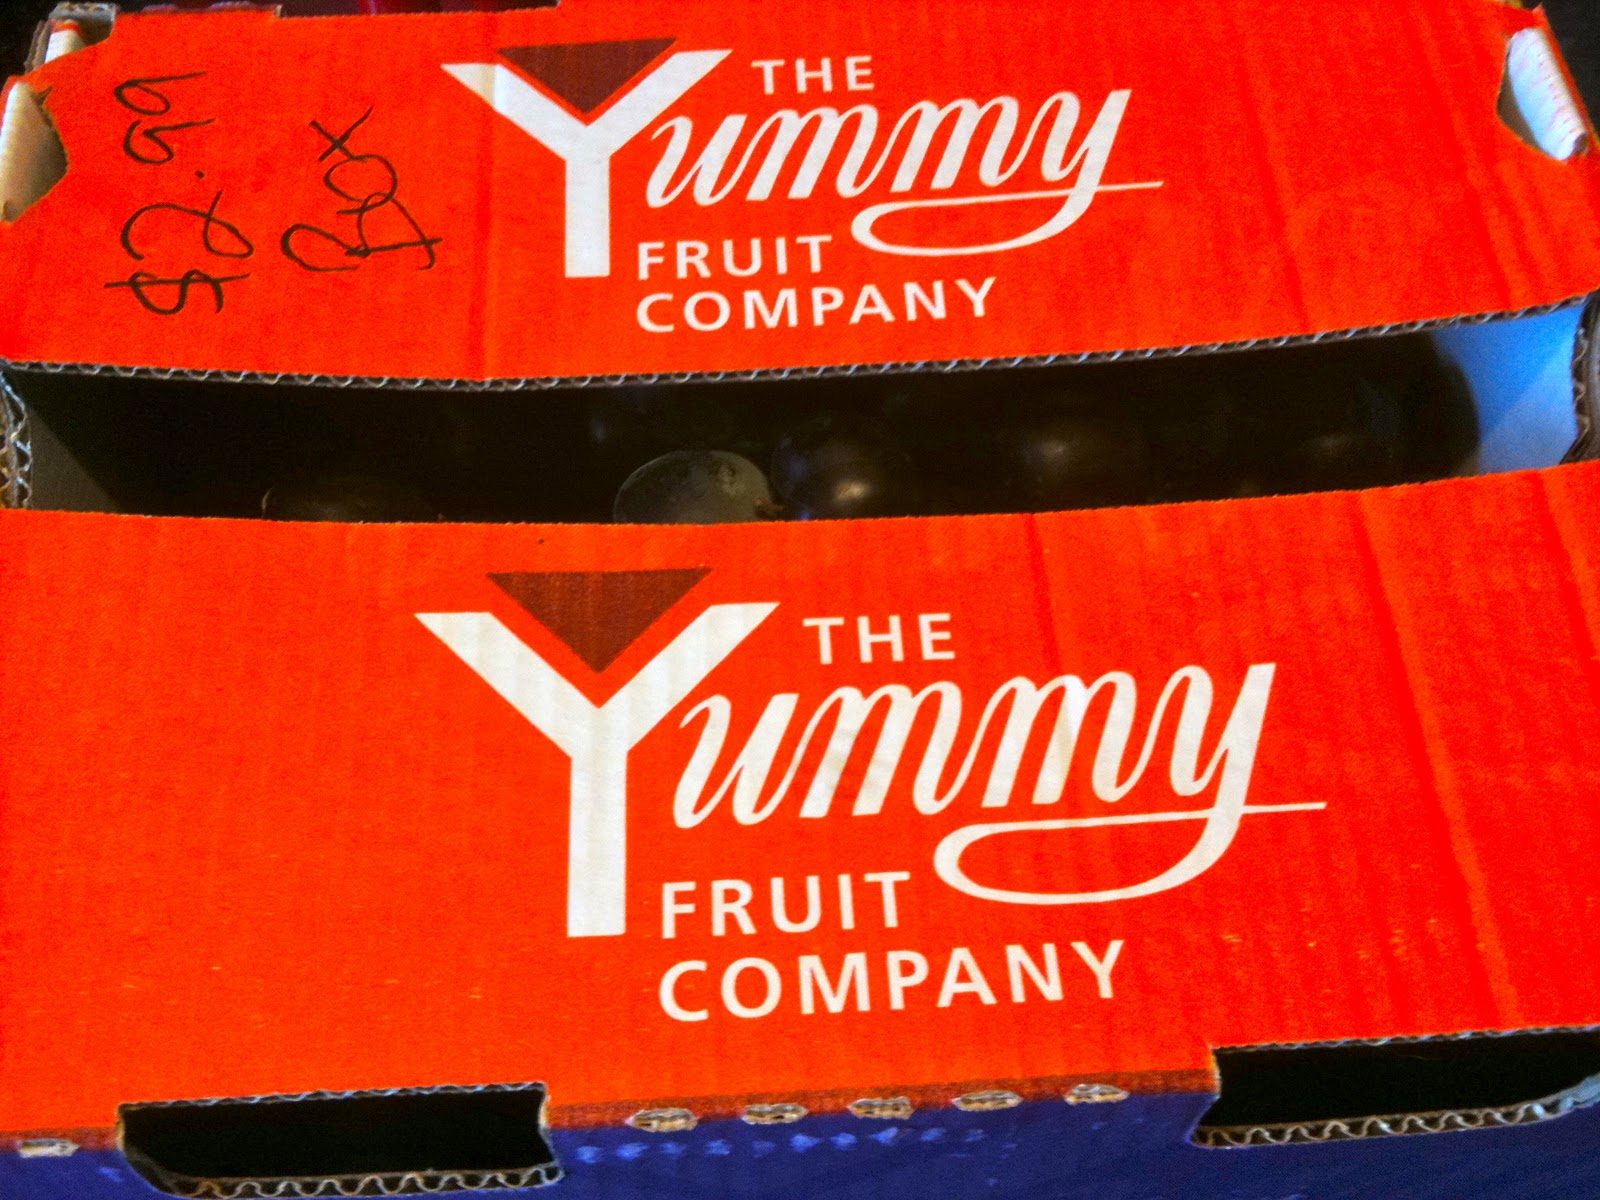
A week ago I was at the fruit and veggie shop when my eye was caught by something on the "Reduced to clear" table. That something is pictured above - a ten kilogram box of Hawkes Bay "black amber" plums for only NZ$2.99. That's about £1.40 or US$2.26 for 10 kg/22lbs of plums! Incredible value or what?!! "Bargainaceous" even!

Needless to say, those plums came straight home with me! Although the plums were obviously past their best (hence their vastly reduced price) I managed to retrieve approx 6kg of plum flesh after the stones and rotten/mouldy bits had been removed. I froze just over half for use another day, and set about making jam with the remainder. This might seem inconsequential, but what you probably don't know is that I haven't actually made any jam since I was about 12 years old, back in the early 1980s. Chutney, marmalade and lemon curd - yes, but jam? Nope!

I used the plum jam recipe in the NZ classic Edmonds Cookery Book …

Plum Jam

2 kg plums, halved and stoned
1.5 cups water
7 cups white sugar

Put plums and water into a preserving pan.


Boil until soft and pulpy. Add sugar. Stir until dissolved. Boil briskly for 15 mins or until setting point is reached. (I used my cooking thermometer to make sure the temp got to 105C, by which point most jams will set.) 


Pour into sterilised jars, a few of which I have photographed below. . .


Makes about 6 x 350 ml jars. 

This jam has so far been pronounced delicious by all who have tasted it, even Sonny Jim, who is usually monogamous to raspberry jam! So there may just be a few more jars of jam gracing these pages at some point now I have rediscovered my inner jam-maker!